Once completed, then Click on OK. Your email will get configured successfully!
How to Setup Email Clients in Mozilla Thunderbird?
The following article will guide you about configuring your Mozilla Thunderbird email client with your web-based email account.

Step 1: Firstly you have to install and start the Mozilla Thunderbird program. Then you have to click on the Create a new account option on the start screen
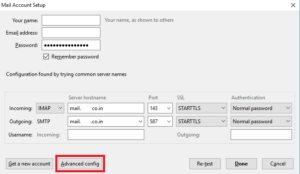
Step 2: The Mail Account Setup screen pops up. Then enter the information as shown below.
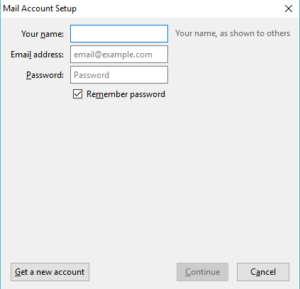
- Your name: Enter your name that you wish it to appear on your messages
Note: The name must be entered in a way as you like it to be displayed for outgoing messages.
- Email address: Your Nexus email address, for example, [email protected]
- Password: Your Sign-in password
Note: Remember password Leaving this un-ticked means you have to enter your password when you open the email program (safer option).
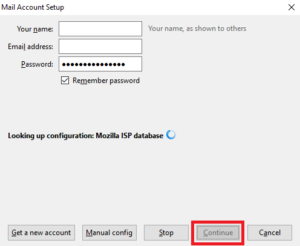
Click on Continue
Step 3: Click on Manual Config
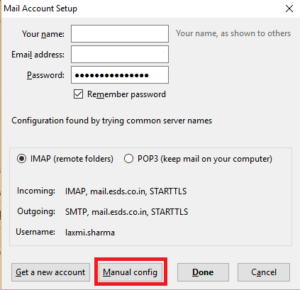
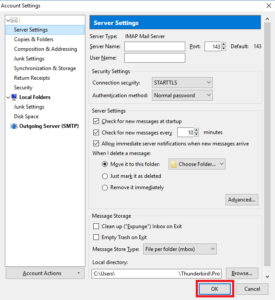
The Mail Account setup screen pops-up wherever you’ll read the Incoming Server, outgoing server, username their Ports, SSL and Authentications that are auto-fetched and auto-filled. You can modification them as required. It’ll choose IMAP without SSL settings by default. For IMAP with SSL*, modify the following settings:
- Username: Enter the username
- Incoming Port: 143
- Outgoing Port: 587
- SSL: SSL/TLS
- Authentication: Normal password
- Outgoing: mail.example.com
You can click on Done to complete the setup.
However, you can click on Advanced Config Button, if you required to configure your server. You can also manually configure the server settings.
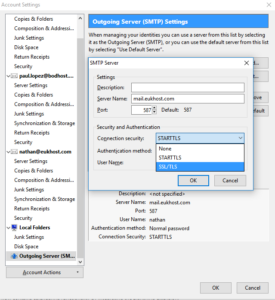
Select Outgoing Server (SMTP) Settings and click on Edit
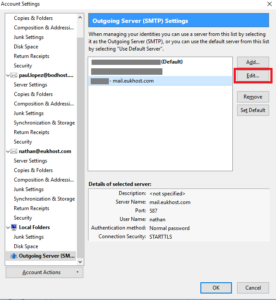
Enter the Description, the Server Name and select SSL/TLS in from Connection security drop down menu.