How to Change the MX Record Priority in Plesk
This article explains the way to change the mail exchanger (MX) records using Plesk. An MX record state that the mail server is responsible for accepting email messages in support of a domain name. Domains that use over one mail server will set their Mx record priority to work out the order during which the mail servers should be used.
Note: If you have got a shared hosting package you’ll need to raise our support team to change MX record entries for your domain.
The following instructions are followed by other Plesk account
1. Log in to your Plesk account.
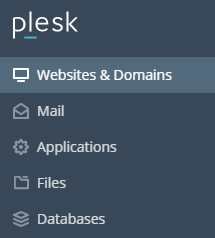
2. Click on Websites & Domains in the left-hand panel.
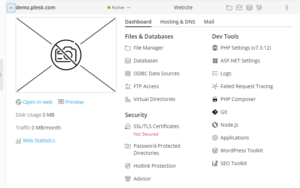
3. In the main screen, click on and expand the section for the domain whose MX record you wish to change.
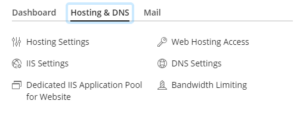
4. Then click on the Hosting & DNS tab in the menu.
5. Under Hosting & DNS, click on DNS Settings.
6. Under DNS Settings you will see a list of your records. Click on the record you wish to change. The Edit the Resource Record screen will then open.
7. On the Edit the Resource Record page, click on the Record Type dropdown box and select the MX option.
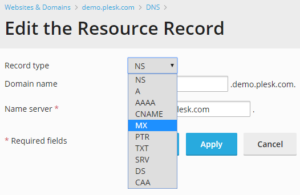
8. A new set of fields will now appear. Enter the details of your mail server (e.g. mail.example.com) in the Name Server field.
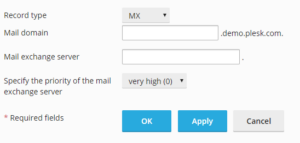
9. Click on the dropdown box at the side of Specify the priority of the mail exchange server. Select the priority you wish. These range from 50 (lowest priority) to 0 (highest priority).
10. Finally, click on OK to save your changes.
Find more information on how to Modify MX records using cPanel/WHM click here.