How to Add and Delete CNAME Records in WHM?
In this tutorial we will guide you with adding and deleting CNAME records in WHM
Firstly lets see the steps to add CNAME in WHM:
Step 1: Login to your WHM account.
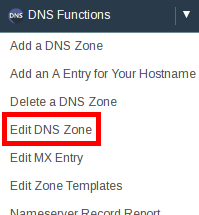
Step 2: Click on the Edit DNS Zone under the DNS Functions section.
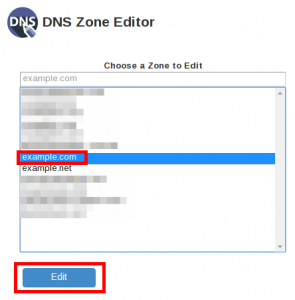
Step 3: Click the domain for which you want to create the CNAME and then click the Edit button.
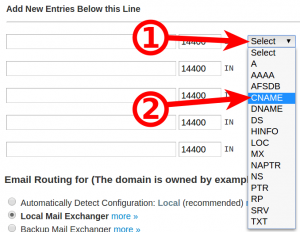
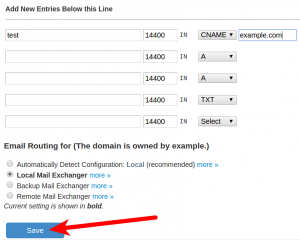
Step 4: Go to the bottom and find the section Add New Entries Below this Line. Click the Select drop-down menu and select CNAME.
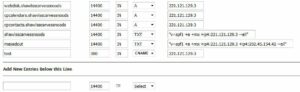
Step 5: Enter your CNAME in the first field. In the image below, we are using test.
Step 6: Next, enter your Hostname in the field besides the dropdown menu and then click the Save button. Here, we are using the host name as example.com. The TTL section will be automatically filled.

Thus by following above simple steps you can add a CNAME record in WHM.
.Following are the steps to Delete a CNAME Record in WHM.
Step 1: Login to your WHM account.
Step 2: Click on the Edit DNS Zone under the DNS Functions section.

Step 3: Click the domain for which you want to create the CNAME and then click the Edit button.

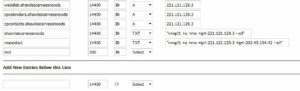
Step 4: Find the CNAME record you want to delete. You will need to delete the text records for that particular domain.
Step 5: Go to the record selector dropdown menu change the record type from CNAME to Select for the domain you have deleted the text records.
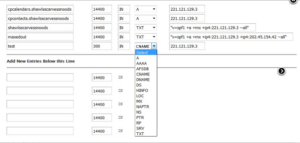
Step 6: This will remove the record type from the screen as below:
Step 7: Click on Save button and that’s it.
Thus you have successfully delete the CNAME records in WHM.