How to Add and Delete CNAME Records in cPanel?
In this tutorial we will guide you with adding and deleting CNAME records in cPanel.
Firstly lets see the steps to add CNAME in cPanel:
Step 1: Login to your cPanel account.
Step 2: Click on the Zone Editor button under the Domains section.

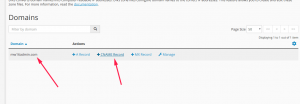
Step 3: Go to the domain for which you want to add a new CNAME record and click on the + CNAME Record option just besides the domain.
Step 4: A new window for Add a CNAME Record for “domain name” will appear. Here enter the name of the domain and CNAME of it. Then click on Add a CNAME Record button.
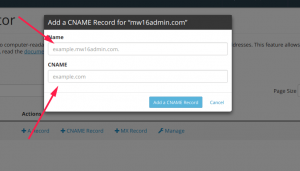
Thus by following the above steps you can add a new CNAME record for a particular domain.
Following are the steps to Delete a CNAME Record in cPanel
Step 1: Login to your cPanel account.
Step 2: Click on the Zone Editor button under the Domains section.

Step 3: Go to the domain for which you want to delete the CNAME record and click on the Manage option.

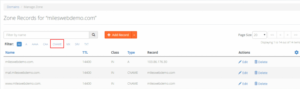
Step 4: This will take you to the Manage Zone where a list of all records will be displayed for each domain. Here click on CNAME to view the list of CNAME records.
Step 5: Click on the Delete option. You will be asked for confirmation prior to deleting the record. Click on Continue and that’s it.
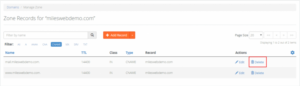
Thus by following above simple steps you can delete a CNAME record in cPanel.