How to Install a Perl Module in cPanel
In this KB tutorial, we we are going to learn how to make Perl extension and increase its capabilities without having to code from scratch. Using a Perl module, To increase the functionality of your scripts you can simply utilise already written code.
To a very well-built machine think of it as placing an add-on. For creating something that was never broken there is no need to return back to the drawing board.
The steps as follow will show you how to install one of these Perl modules in the cPanel.
Perl Module Installation Steps:
STEP 1: Sign into your cPanel.
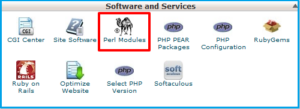
STEP 2: Under the Software and Services section Click on the Perl Modules link .
STEP 3: As per your choice Type the name of a Perl module in the Search box. For example, type Authen in search box and then click on Go.
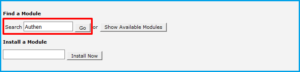
STEP 4: All the Perl modules that match your search will be shown by the search result on the next page . To install it Click Install next to the Authen module .
STEP 5: You will notice scrolling text on the screen During the Perl module installation. After the installation is complete, you will see a success notification same as mention below:
Successfully installed Authen.
1 distribution installed
That’s it. You have officially extended the functionality of your Perl scripts With this module installed.