How to Set Up Spam Filtering in cPanel
If you want an effective way to filter email spam, you’ll be able to do this with the help of the built-in SpamAssassin tool present in cPanel. This tutorial, will going to explain you the setup and configuration processes.
Following are the steps shows to enable Apache SpamAssassin:
1. Log in to your cPanel
2. From the Email section, click on the Spam Filters icon.
3. Once the SpamAssassin page gets opens, click on the toggle button next to Process New Email and Mark them as Spam. Spam filtering gets enabled, as the button turns blue
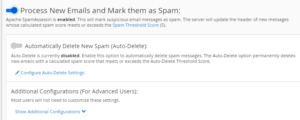
4. Enabling SpamAssissins filters out suspected emails and places them in an exceedingly separate spam folder in your inbox. If you’d like to not do this, you’ll be able to activate auto-delete, which can automatically delete suspected spam emails.
Remember, some real emails might even be suspected of being spam. If you change auto-delete, these are going to be deleted too.
5.You can also go ahead with enabling auto-delete, click the toggle button present next to Automatically Delete New Spam (Auto-Delete). Once the button turns blue, auto-delete is enabled.

Configuring Spam Filtering
With enabling and disabling spam filtering, you’ll be able to additionally configure SpamAssassin by changing the spam threshold or adding addresses to whitelists and blacklists.
Changing the spam threshold
Email messages are scanned on arrival and given a score out of ten based on the chance of them being spam. Spam Assassin’s default spam threshold score is 5, thus any message scoring a 5 or higher are going to be sent to the Spam folder. If you find too few or too several emails are being filtered, you’ll be able to regulate the threshold score. Follow the below to do this:
1. You have to Go back to the method New Emails and Mark Them As Spam section and click on the blue Spam Threshold Score link.

2. Once the new page opens, click on the dropdown options box and select for the new threshold score you need. The lower the amount, the additional aggressive the spam filtering are going to be.

3. Once you have got made your decision, click the blue Update Scoring Options button to finish the method and save your changes then click on Return to overview.
Moreover, to make sure that the emails you want to receive does not get blocked and that those you want blocking don’t get through for these you can enter emails in the whitelist and blacklist. Check the below step to do this.
1. Scroll down to and find the Additional Configurations (For Advanced Users).
2. Then Click on the Show Advanced Configurations link.
3. You an also Click either on the Edit Spam Whitelist settings link or Edit Spam Blacklist settings link.
4. Once the page gets opens then click the Add New Whitelist/Blacklist Item link.
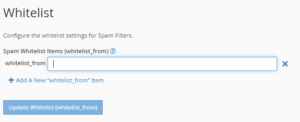
5. In the input field type the name of the email address that you want to whitelist or blacklist and then click the blue Update button.
6. From a specific domain, you can also receive or block messages, rather than an individual address, you can do this by typing *@nameofdomain.com.
7. If you wish to remove item from the list, yo can return to these pages
For more information regarding cPanel, visit the cPanel Section of our knowledgebase.