How to create Phpinfo file using cPanel to check PHP Version and Configuration
The below-defined steps will shortly justify however you’ll find the PHP version of your server, creating a Phpinfo () page under public_html () directory to execute the various task. The PHP version matters lots if you attempt to run PHP software on your web site, it’ll need a minimal or specific PHP version, and it may be used for debugging purposes because it contains all EGPCS (Environment, GET, POST, Cookie, Server) extensions entered in for the various setting choices.
To check PHP version and configuration follow the steps as shown below,
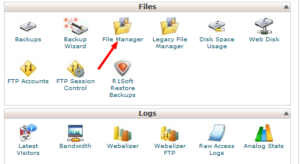
1. Log into your cPanel account using your login details.

2. Look for Files section and click on the File manager.
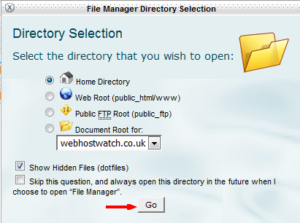
3. Choose Home Directory and click on Go it will redirect you to the root folder of your server.
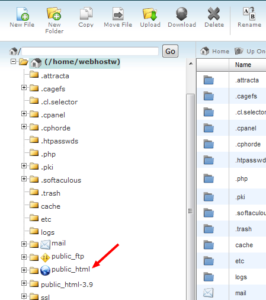
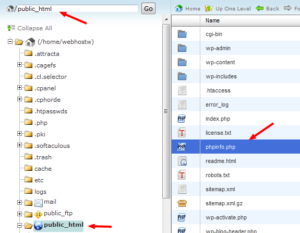
4. From the folder hierarchy Select Public_html() folder to create a file.
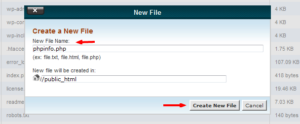
5. After this to know PHP version and other extensions click on the new file to add a new file to the public_html.
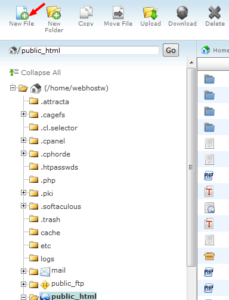
6. In New File Name textbox enter phpinfo.php and click on Create New file.
7. The new file will get created successfully and you can check it under public_html().
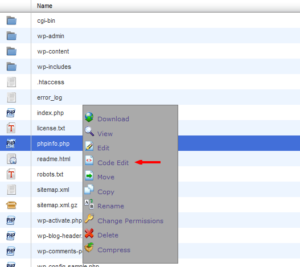
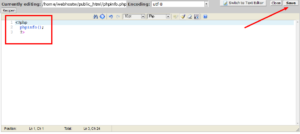
8. Choose phpinfo.php file and to select Code edit right click on file and to add a small line of code as given in the next step.
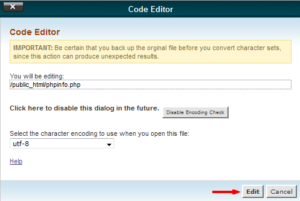
9. Add this code to the file, after adding it click on save.
<?php
phpinfo();
?>
10. Open a new tab in your browser and type your domain name, add this /phpinfo () .php (www.yourdomainname.com/phpinfo.php) to induce all the main points associated with PHP version and extensions.