How to Create & Manage Databases With PHPmyadmin in Cpanel
While creating a database, following are some further things that they have to organize –
- Creating a database user
- Giving your database user rights to work with your database
Fortunately, cPanel added the MySQL Database Wizard which will help in creation of database just by following the steps given below.
How to create database in cPanel using the MySQL Database Wizard-
- Login to your cPanel account provided by your cPanel hosting provider
- Click the MySQL Database Wizard below the Databases
- Enter a name for your database next to New Database and click on Next Step
- Enter a username Next to Username.
- Enter a password next to Password, reenter the Password and then click on Create User
- On the next page, you can assign rights for the user to the database. Check the box next to All Privileges and then click on Next Step
Thus you have successfully created the database!
For managing the databases by using phpMyAdmin in cPanel, you can handle various options such as:
- Structure: Helps to organize your schemas, tables, and columns.
- SQL: Runs SQL query/queries on a database.
- Search: Searches words or values inside database tables.
- Query: SQL defines a set of commands, such as SELECT, INSERT, UPDATE, DELETE, CREATE TABLE and etc.
- Export: Exports database in different formats such as CSV, PDF, SQL, XML, Text etc.
- Import: Imports database in different formats such as OpenDocument Spreadsheet, CSV, SQL, ESRI Shape file, MediaWiki Table, XML.
- Operations: There are various operations which you can execute on the whole database and on a separate table.
- Triggers: A trigger is known as database object that is linked with a table, and it activates whenever a particular event (e.g. an insert, update or delete) happens for the table.
The basic functionality of the phpMyAdmin is to manage your databases. To create database follow the below steps:
Step1:
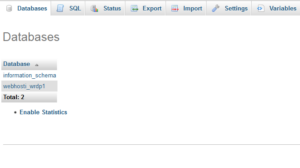
Click on the Databases tab. Select the database which you want to manage and click on the database name.
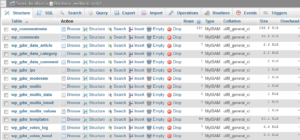
Step 2: After clicking on the database name, the list of database tables will get appear.
Operations to Perform on the Database
Browse:
With existing records, You can browse the database tables. When you click on the table name, the Browse window opens with the records.

The record can be edited by simply clicking on the Pen symbol.
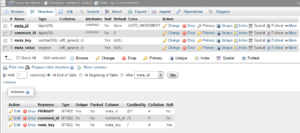
Structure:
In the structure screen you will see the structure of database’s table. Which will include the field name, their data types, collation, attributes etc. You can change the field’s structure as well as delete a field. Also, you can assign indexes i.e. Primary, Unique, Index, Fulltext.
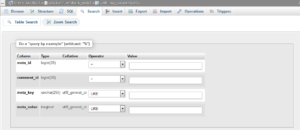
Search:
By using Search action, you can create a search query for the selected table. Either you can write the WHERE clause or use the “query by example” option. Click on the Go button to perform search query.
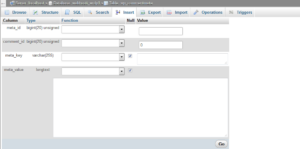
Insert:
Through the Insert action, record can be inserted in database. To insert a new record you require to fill the appropriate values and click on the Go button.
Empty:
Using the Empty option, you can empty your database table. It will remove the records and keep the table blank.
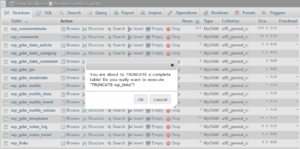
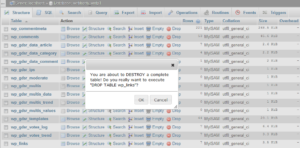
Drop:
You can delete the table as well as delete stored records in it by using the Drop option.